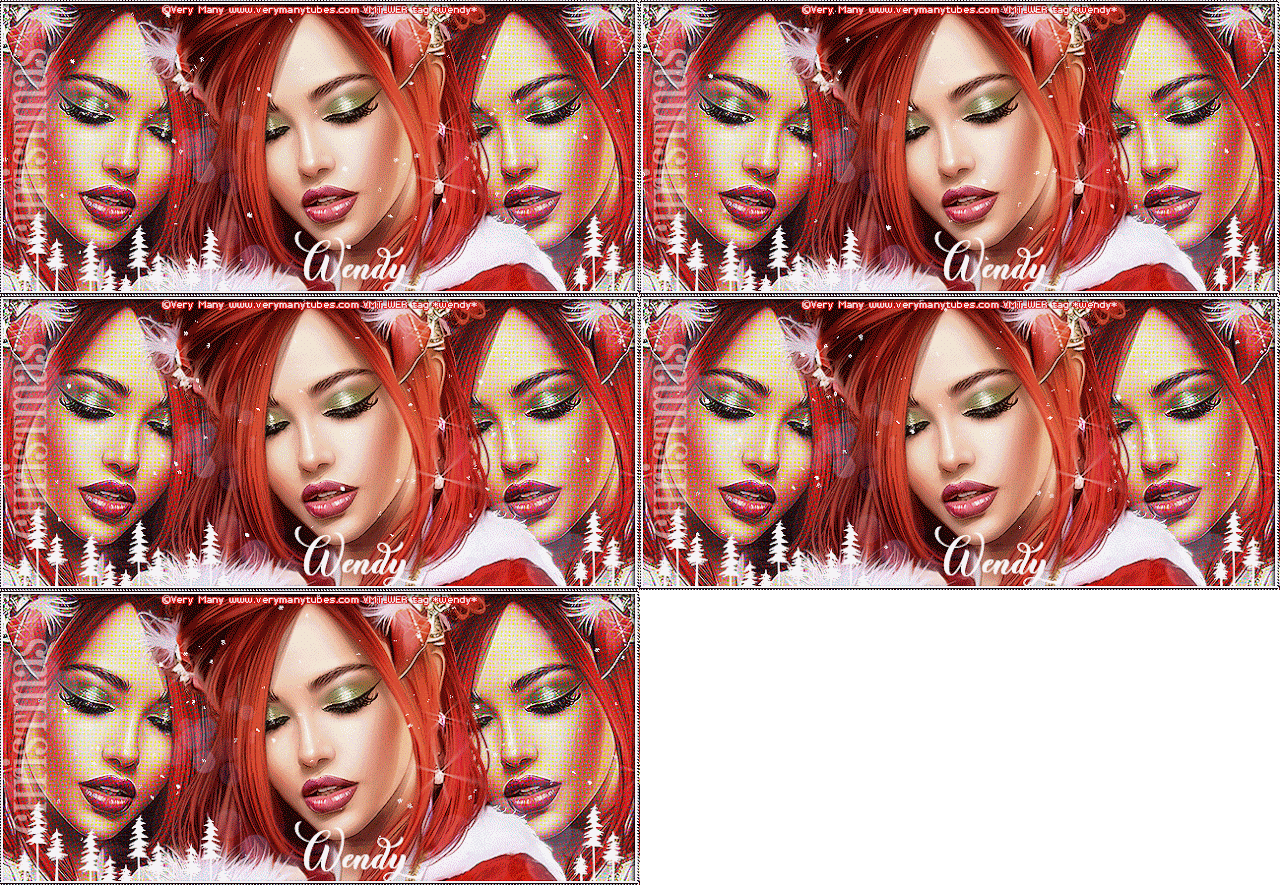
In this forum tag PSP tutorial, I used the artwork of Very Many
a tube called Christmas Mood 8
You must have a proper license for use of her images.
No filters, no scraps
Bokeh Bubbles Brushes
by Vadimfrolov HERE
You must be a member of DeviantArt to download.
Dingbat Font: Farm Doodles HERE
Download TTF
Credits HERE
Fonts used: Christmas Wish, Pharmacy
Snow Animation HERE
Dropshadow 2, -2, 35, 5 Black or one of choice
*~ Let's get started ~*
1. Open a new transparent image 650 x 300 px
Flood fill white.
Open tube of choice
C/P over center of working image.
Select white bg
Selections ~ select all
Back to tube layer ~ Image Crop to Selection.
Deselect.
Duplicate tube, mirror, move copy of tube to left edge.
Objects ~ align ~ Vertical center in Canvas
Duplicate this tube, mirror
Select center tube, move to top layer in layers palette
Adjust position of center tube so no white background shows
between center tube and the outer tubes.
Objects ~ align ~ Vertical center in Canvas once again.
Duplicate center tube, close duplicate for now.
Merge down the original center tube to the
two outer tubes.
Effects ~Edge effect ~ Enhance
Duplicate this layer
Effects ~ Artistic Effects ~ Halftone: default settings
change blend mode to Color (L)
2. New raster layer ~ rename 'brushes'
Select a foreground color from your tube
I chose #3a3a50
(a purple from her lips)
Select the brush tool, choose bokeh bubbles from drop down menu.
Settings: sz 50, step 27, density 100, opacity 100
Tap the brush in several areas on working image.
I tapped 5 different areas. Each tap results in varied
brush sizes. This is the desired effect.
Change blend mode to 'screen'
3. Open the center tube we closed earlier.
Duplicate
On original tube layer, adjust Blur ~ Gaussian blur ~ 1
Select top copy of tube, duplicate again
Photo Effects ~ Vignette
settings: -4, 52, 62, 15
Photo Effects ~ Black & White Film: -17, -92
Change blend mode to soft light
& drop opacity to 56
4. Make your brush layer the topmost layer by moving above all tube layers
Using dingbat font ~ Farm Doodle ~ sz 100
close foreground, bg colour white, anti-alias: sharp
Type 'E' ~ convert to raster layer, duplicate
Retype 'E' in size 75
Make a tree-line of trees along bottom of tag.
I grouped several trees, arranged in different heights. Merge them down together.
Add a slight drop shadow 1, -1, 45, 3, black if desired.
See reference tag.
5. Add a new raster layer above all other layers.
Change foreground colour to white
Flood fill this layer white
Selections ~ Select All
Selections ~ contract by 4, delete.
Selections ~ Modify Expand by 4, add a new raster layer
Flood fill with foreground colour #3a3a50
Selections ~ Modify contract by 2, delete. Deselect.
Rename this layer ~ Purple border
Rename layer below ~ White border
Be sure you are on Purple border layer,
Effects ~ Texture Effects ~ Weave
settings: 1, 2, 25, fill gaps checked, white, white.
Image ~ flip ~ flip vertical,
reapply same Weave setting.
Image ~ flip ~ flip vertical.
If you wish to add a dropshadow,
do so on the white border only
2, -2, 35, blur 5, black
5. Using Pharmacy font, sz 48, bg colour white
Type CHRISTMAS
Convert to raster layer,
rotate left 90 deg. Place along left border
Object ~ Align ~ Vertical center in Canvas.
Add a faint dropshadow, 1, -1, 55, 5, black.
Drop opacity to 45.
Add copyright information & license.
6. If you wish to animate,
close purple border & white border.
Add a new raster layer above the white
background layer. Rename it 'blank'.
Copy Merge all the layers.
Open Animation Shop
Paste as a New Animation
Duplicate frames by clicking on Duplicate icon
until you have 5 frames.
Edit select all,
Edit ~ Propagate Paste
Open animation supplied, it too has 5 frames.
Edit ~ select all
Change frame properties from 1 to 10.
Edit ~ Copy
Place the two animations side by side in A/S
Drag the first frame of snow ani on top of first frame of working image
placing it on left.
Back to snow animation, edit ~ undo drag
Copy snow ani again, place on right of working image.
Repeat undo, & place on center.
View animation.
Back to PSP, close off all layers except purple border, white border & blank layer.
Copy Merged
Back to A/S, paste as new animation. Duplicate to equal 5 frames.
Edit ~ Select all
Edit ~ Copy
Drag first frame of border onto first frame of working image.
Review animation.
If any errors in placement, simply undo drag from working image.
Save animation as a MNG without a Name on it
to be used as your blank.
Back to PSP, add name in colour white. Dropshadow. Copy
Back to A/S, paste as new animation.
duplicate to 5 frames. Edit ~ select all
Edit ~ select copy.
Drag first frame onto first frame of working image.
View animation again.
Save using Optimization Wizard
setting: optimized Octree
Save as a Gif.
Enjoy your forum tag!
*~* Merry Christmas *~*


No comments:
Post a Comment