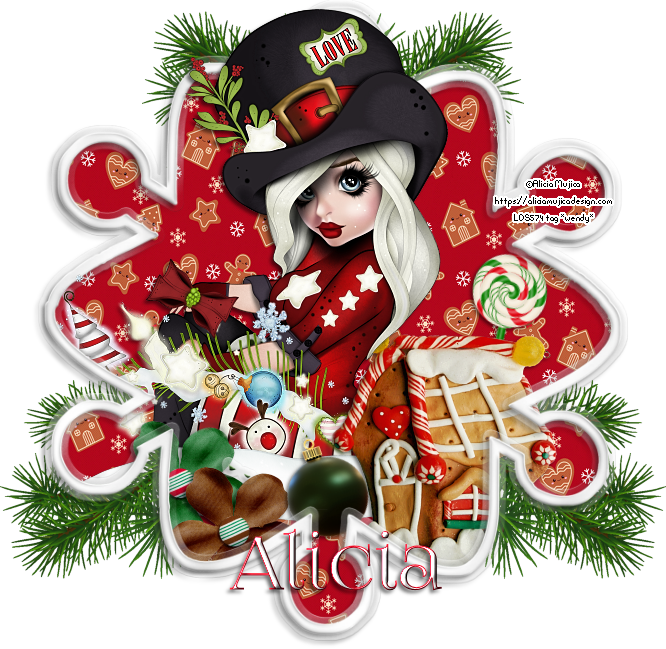
In this quickie PSP tutorial I used the artwork of Alicia Mujica Designs
a tube included in the Black Friday Pack 2016
You must have a proper license for use of her images.
Freebie by Raspberry Roads called Gingerbread Christmas
available HERE. You do need to login to d/l this freebie.
Font for Name: Foglighten No.07
To sharpen elements, use Adjust sharpness ~ unsharp mask
setting: Radius 1, strength 55, clipping 1,
luminance only checked.
A drop shadow of choice
*~ Let's get started ~*
1. Open element 15, r/s to 650 x 650 px, all layers checked.
Image Canvas ~ 700 x 700 px centered
Add a new raster layer, send to bottom of layers palette
Flood fill white.
Select snowflake layer, using magic wand: tolerance 10, feather 0,
click inside center of snowflake frame
selection ~ modify expand by 12 px.
Add a new raster layer
move this new layer below snowflake
Open paper 1, copy & paste 'into' the selection. Deselect
Sharpen paper once.
2. Open main tube. If using same, resize 25%
C/P above paper layer.
Should any of the tube layer extend beyond snowflake,
select paper layer, click with magic wand 'outside' of paper area
Select tube layer, erase any part of tube that extends beyond
except her hat & greenery.
Duplicate tube. Close duplicate copy for now.
Do not deselect.
3. Add elements of choice, all placed below snowflake frame.
I added elem 24 ~ 35%
elem 11 ~ 20%
elem 12 ~ 20%
elem 21 ~ 10% use pick tool to rotate slightly left, sharpen
elem 22 ~ 10% Use pick tool to rotate slightly to right, sharpen
elem 25 ~ 25% C/P below paper layer to right of snowflake
duplicate, image mirror, duplicate again,
move this copy to top, just left of center, duplicate, mirror.
*see reference tag for placement if needed*
4. Unhide duplicate copy of tube. Move to very top of layers palette.
Erase any portion of the tube that covers any of the elements below it.
For example: gingerbread house, flowers, etc.
Add dropshadow to this tube layer only using
dropshadow checked on 'new layer' option.**
This allows erasure of any undesired dropshadow.
**Adding a drop shadow on a new layer allows
you to adjust opacity, adjust direction and adjust colour too.**
Note: When adding dropshadows to the elements, be sure
the shadow does not extend beyond the snowflake frame.
If a shadow does appear beyond frame, select
the paper layer and using magic wand, click outside this paper layer
to make a selection and then select element layer to erase any undesired dropshadow.
Deselect when done.
5. Add dropshadow to snowflake frame.
I did not add a dropshadow to elem 25 (spruce tree branches)
6. If you wish to resize tag, do so now
then add copyright, license, url & name.
Delete white background layer.
Merge visible, crop merged opaque
and save as a PNG.
Voila! I would love to see your result. :+)
*~* Merry Christmas *~*


No comments:
Post a Comment